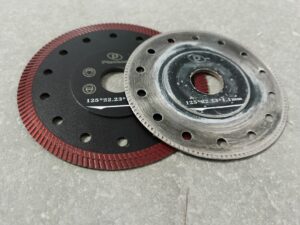
Diamond openers are indispensable tools for working with hard materials such as gres, ceramics or stone. However, even the best quality equipment over time loses its original effectiveness. Instead of immediately investing in a new, expensive drill, it is worth learning about the methods of regeneration. The correct and regular sharpening of diamond openings not only restores their full performance, but also significantly prolongs their lifespan, which translates into real savings. In this guide, step by step, we will explain how to recognize the signs of bluntness, how to regenerate the embankment and how to take care of the tools to serve as long as possible.

When sharpening the diamond hole: signs of blunting
The key to maintaining maximum tool performance is the ability to recognize the first signals of its wear. Working with a blunt hole is not only frustrating and time consuming, but it can also lead to damage to the workpiece and drill itself. Paying attention to changes in the behaviour of the tool during work allows action to be taken at the right time. Ignore these symptoms leads to faster degradation of the diamond embankment and in extreme cases prevents effective regeneration.
The main sign of blunting is a clear decrease in drilling speed. The hole, which had previously been created in several dozen seconds, now requires a few minutes of work and much more pressure. Another signal is the overheating of the tool and material – smoke or the characteristic smell of burning can appear, and the edges of the hole can become burnt or shredded. It is also worth a visual inspection: if the cutting edge of the hole is smooth to the touch, and the individual grains of the diamond are not palpable, this means that the metal binder has covered the abrasive particles and the tool requires "discovering".
Diamond hole sharpening methods: stones, pastes
The sharpening of a diamond hole is a process different from sharpening traditional tools such as knives or metal drills. The goal is not to get a sharp edge, but to remove the thin metal binder layer that holds the diamond grains. In this way, new, sharp crystals are unveiled, which restores cutting ability. For this purpose, two methods differing in application and effectiveness are used.
The most popular and most effective method is special sharpening stones, often made of silicon carbide or corundum. They work on the principle of controlled abrasion – their hardness is selected to remove the softer binder without damaging the hard grains of the diamond. The second method is to use diamond pastes with proper gradation. However, it is a more time-consuming and delicate process, used rather for precise finishing or cleaning of the embankment than for its thorough regeneration. In workshop practice, sharpening stone is a faster solution and completely sufficient.
Diamond hole sharpening technique: step by step
The correct technique is crucial to effectively sharpen the tool without risking damage. This process is simple and does not require specialised skills, but only precision and compliance with several basic principles. The instructions below are step by step, which will help in a safe and effective way to answer the question of how to sharpen the diamond hole using sharpening stone.
Warning using stone: instructions
Safety must be ensured before joining work. Wear protective glasses to protect your eyes from splashes, and work gloves. Make sure that the sharpening stone is firmly attached and does not move during operation.
- Step 1: Preparing tools. Attach the hole to the handle of the drill or screwdriver. Prepare a small amount of water for cooling to prevent overheating of the diamond embankment.
- Step 2: Sharpening process. Start the drill at low or medium speeds. Gently and at right angles apply the rotating opening to the surface of the sharpening stone. Perform short, several-second cycles by regularly dipping the hole tip in the water to cool.
- Step 3: Driving movement. When in contact with the stone, make gentle movements forward and backward and to the sides to ensure a smooth clash of binders throughout the crown circuit.
- Step 4: Effects control. After a few cycles, stop the drill and check the cutting edge. It should become rough again, with clearly noticeable diamond grains. If the effect is satisfactory, the process is complete.
- Step 5: Cleaning. Once the sharpening is complete, rinse the hole thoroughly under running water to remove the residue of the binder and dust from the stone, then dry it before hiding.
Most common errors during sharpening and how to avoid them
During the recovery of the diamond embankment it is easy for errors that can shorten or even destroy the tool life. The awareness of the most common mistakes allows them to be avoided and the process carried out optimally. The most important is patience and sensitivity – sharpening is a process of controlled wear, not aggressive cutting.
A fundamental mistake is the use of too much pressure on the sharpening stone. This may lead to the diamond being torn from the binder instead of its delicate unveiling. Another problem is the lack of cooling – dry work causes overheating, which weakens metal binding and can permanently damage the hole. Avoid sharpening on random hard surfaces such as curbs or concrete blocks. Their structure is uneven and may cause damage to the embankment. Remember, too, to conduct the process evenly throughout the circuit to avoid the "beat" of the opening during later work.
Maintenance of diamond openings: cleaning, storage
For the diamond hole to serve as long as possible, sharpening itself is not enough. Regular and correct maintenance of diamond openings, which begins at the work stage, is crucial. Care for the tool after each use minimizes the risk of corrosion and mechanical damage, as well as ensuring readiness for the next task. These are simple habits that have a huge impact on the life and performance of equipment.
The base is water cooling during drilling in hard materials. This prevents overheating and premature embankment. After each work has been completed, the opening should be thoroughly cleaned of residues of material, dust and possible lubricants. It is best to do it under running water using a soft brush. After washing, the tool must be thoroughly dried to prevent rusting of the body. The last element is storage – the openings should be kept in a dry place, preferably in original packages or special organizers, which protect the delicate cutting edge from impact and damage.